Wednesday, June 26, 2013

Summer Fun Popsicles

Summer lovin' had me a blast.  Summer lovin' happened so fast.  Oh well, oh well, oh well, oh well, huh!  That Grease song gets in my head sometimes when I think about the fun of summer.  Summer can be tricky with having school age kids home for summer, they seem to throw everything off.  Plus it's more mouths to feed during the day.  My oldest is going to be in second grade.  Although she is a petite little thing, she can out eat anyone, anytime.  She is constantly hungry and for the most part always finishes everything she's given.  She has even gotten trouble for sneaking extra snacks and candy in her school backpack and for spending all her saved money on buying food at school too.  She is ridiculous!  I promise you, she is fed enough, she just has her daddy's metabolism that is super fast.  They both are hungry every 5 minutes.  The funny part is that daddy has little patience with her with this.  Ironic isn't it?  The things that our kids get the most from us, are the things that drive us the most crazy.  Funny, funny life.
That being said, I've told you all how I've been trying so hard to cut out the processed junk from my kids snacks.  One thing they always love, like most kids, is Popsicles.  I wanted to make some of our own.  I got a little creative myself with it and made 3 different kids.  My kids all seem to like them all. 
Enjoying a nice cold treat after a hot day of swimming :)

Strawberry Cream Pops
1 cup (or more) Greek yogurt
8 oz frozen strawberries in syrup, slightly thawed
Blend together adding more or less of each until you reach a good consistency.  Pour into 5oz paper cups and freeze on cookie sheet for 15-20 minutes, pull out and insert Popsicle stick in the center of pop and put back into the freezer for at least 2 hours or until frozen through. Peel off paper cup when ready to eat and enjoy.  Makes about 6 pops.

Blueberry Cream Pops
1 cup (or more) Greek yogurt
1 cup frozen blueberries
1-2 T honey
Blend together adding more or less of each until you reach a good consistency and sweetness  you like.  Pour into 5oz paper cups and freeze on cookie sheet for 15-20 minutes, pull out and insert Popsicle stick in the center of pop and put back into the freezer for at least 2 hours or until frozen through.  Peel off paper cup when ready to eat and enjoy.  Makes about 6 pops.

Strawberry Ice Pops
8 oz frozen strawberries in syrup, slightly thawed
about 1 cup 100%  apple juice
Blend together adding more or less of each until you reach a good consistency.  Pour into 5oz paper cups and freeze on cookie sheet for 20-25 minutes, pull out and insert Popsicle stick in the center of pop and put back into the freezer for at least 2 hours or until frozen through.  Peel off paper cup when ready to eat and enjoy.  Makes about 6 pops.


Thursday, June 20, 2013

Vanilla Rice Pudding Deliciousness

Ever since I was a little girl I have loved rice pudding.  Although, I think it was the one thing that my mom never made.  I always had it at restaurants if they had it in a salad bar or dessert or something.  I had pinned this recipe for Vanilla Coconut Rice Pudding a while back and kinda forgot about it.  Then I was at my friend's house and she had made some.  It was so good!  I hadn't had rice pudding in a long time and almost forgot how much I like it.  Then I remembered I had a recipe pinned for some.  I found it.  To my happiness I had everything I needed at home.  Even the coconut milk and vanilla bean!  I was so excited to try this and so hoping it was going to turn out good.  Oh. My. Goodness.  Did it turn out?  It was deliciousness in my mouth!  It was creamy, had amazing vanilla flavor, a hint of cinnamon and was just plain to die for!  This has become a treat for me.  No one else in my family likes it, which I'm ok with.  More for me then!  I usually double or make 1 1/2 recipes of it and snack and dessert and salivate over it for a few days.  It is just so yummy!  I like it warm.  So even though I keep it refrigerated I always heat it up in the microwave to make it good and steamy.  Is it just me, or is starting to sound a little time like a bad romance novel?  Ha ha!  Ok, I think  you get the idea now that this is deliciousness and that you have to try it!!!  Let me know if you love it as much as I do!

Vanilla Coconut Rice Pudding
(adapted from Ffffood)

1 1/2 cups of cold cooked rice (I either use left over rice, make sure to make extra so I have left over rice or cook it an hour or 2 before I'm going to make it so it can cool before I make it.)
1 1/2 cups of coconut milk
2 cups of whole or 2% milk
1/3 cup of sugar
pinch of salt
1 vanilla bean, insides scraped out (The first time I made this I scraped the seeds out and put them along with the bean pod in the pot.  The second time I used only the seeds.  The last time I made this I didn't have any beans and added 2 tsp of vanilla extract and it was still great.  I don't think you can go wrong here any way you make this.)
1 cinnamon stick (this is my addition and it give this a great cinnamon undertone)

Combine all the ingredients together in a saucepan and simmer over medium-low heat for 40 minutes (or until most of the liquid has absorbed and is good and creamy looking). Stir occasionally to make sure it isn't sticking.  Allow to cool and serve.

Cha-Cha-Cha-Chia!

Alright, am I the only one that sings that commercial jingle every time you see a recipe for Chia Pudding?  I mean, come on, it was one of those huge novelties things from childhood.  Who here had Chia Pet?  I didn't, but I always wanted one to try.  I guess now is my chance!  Cha-cha-cha-chia!  Oh that makes me smile from the inside out.  :)  Guess what?  They're even still around!  Everything from a hippo to Sponge Bob.  Did you know they even make those things in the form of our president?  And not just in one style either.  No, they have him "happy" and "determined."  Now that's funny!!  Just me?  Oh well, at least I amuse myself.  Ha ha! 
Ok, anyways, back to where I was going with this.  So chia seeds are the new big health thing it seems anymore.  Add them to your smoothie, oatmeal, yogurt or anything else for that matter.  Similar to flax seeds in nutritional value.  Loaded with Fiber, Omega 3's and Protein, can't go wrong I guess.
I kept seeing recipes for Chia Pudding and pictures of this odd looking stuff.  I was intrigued and wanted to try it.  On a recent trip in Trader Joe's I saw a bag of them and there, right on the back of the bag, was a recipe for Chia Pudding.  I thought I'd give it whirl and still looked up few variations of Chia Pudding on Pinterest.  One that caught my eye was for Chocolate Coconut Chia Pudding.
So here is my take on the stuff...  It is easy enough to mix up to have a snack or treat.  The look of it is so weird.  It looks like caviar in cream almost.  Gross.  The taste isn't bad, but the texture for me was off putting.  I didn't really care for it much.  Be your own judge.  Try for yourself.  Maybe you'll love this healthy treat.  Me, not so much.

Yes, I used a recycled pickle jar, but it worked
great!  Look at that funky stuff!
Chia Pudding

In a jar combine:
1/4 cup Chia Seeds
1 cup coconut or almond milk
1/4 cup or less of honey or sweetener of you liking.
Add in flavoring, fruit or cocoa. 
Cover, shake to combine and refrigerate for at least 2-3 hours or overnight.
Chocolate Coconut Chia Pudding

Mama's Apple Dumplings

I think that most people have those certain foods that their mom made growing up, no matter how fancy or not, that just make you feel so comforted.  Since my brothers and I were completely spoiled with the best mom who has always been the best cook, there are so many favorites!  One favorite that has even spread onto each of our spouses as well is my Mama's Apple Dumplings.  I know I'm a mid-west girl from Ohio and not a southern one with an accent, but when talking about dumplings it only feels right to say "mama's" instead of "mom's."  Don't you think?  Her apple dumplings are so good.  I don't even think their is a season for them, I make them year round.  In fact, they are what my hubby wanted me to make for his father's day dessert this year.  Comfort food at its best, right here!
They are best hot out of the oven, but if you happen to have any left over they are great reheated in the microwave too.  Most members of our family pour in a slash or two of milk when we eat ours, but feel free to top them with ice cream or whipped cream or anything else your heart desires.  These are also easy to adapt to make them GF by substituting your favorite GF double pie crust recipe or using GF all-purpose flour in the following recipe.  Or if you feel way too intimidated to making your own pie crust, go buy some ready to use crust from the grocery store and tell everyone you made it.  :)  Sometimes when it's colder out we'll have double dumpling night and I'll make Apple Dumplings and Dumpling Soup for dinner.  Yum!

Double Pie Crust

Ingredients:
2 cups flour
1 tsp salt
1/4 cup chilled shortening, cut into small cubes
1/2 cup (or 1 stick) butter, cut into small cubes
4-8 T ice cold water

Directions:
-Combine flour and salt.
-Cut shortening and butter into flour using a pastry blender or by pulsing in a food processor until it looks like coarse crumbs with pea size pieces. 
-Add in water a couple tablespoons at a time, mixing until the dough holds together.
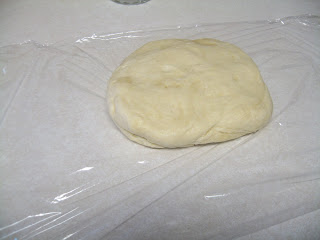
-Form dough into 2 balls and flatten on 2 pieces of plastic wrap
-Refrigerate for 30-60 minutes before rolling out.
-Roll dough out on a lightly floured surface to desired size and place in pie plate


Mama's Apple Dumplings 
makes 6-8 dumplings

Ingredients:
Double Pie Crust, prepared
2 large Granny Smith apples, peeled, cored and cut into small cubes
1/2 tsp vanilla
1T cinnamon or cinnamon spice mixture
about 1 stick of butter
about 1/2 cup brown sugar
2 cups dark Karo syrup
2-3 cups of water

Directions:
-Preheat oven to 400
-In a bowl combine apples, vanilla and cinnamon, mix until apples are evenly coated with cinnamon.

 
-In a 9x13 baking dish, whisk together Karo syrup and water. (For a thicker sauce less water for a thinner sauces more water.  Either way it will be watery at this point.)  Whisk it until it is fully combined.
 
-Roll out your prepared pie crust  in one large rectangular shape.
-Use a knife to cut into fairly equal size "squares."  They do not have to be perfect.
-In the middle of each "square" put a large spoonful of apples.  Top apples with about 1 T butter and 1 T brown sugar.  More or less of each to your liking.

 
-Fold corners of each "square up and form into a ball, pinching all sides to conceal the apples with no openings.
 
-Place sealed up dumpling in syrup in baking dish

 
-Repeat with remaining dumplings
-Sprinkle tops of dumpling with extra cinnamon if you desired
-Bake at 400 for 45-60 minutes or until bubbly and golden brown.


Wednesday, June 19, 2013

Laundry Time!

I used to have one day a week that was laundry day.  Now, three kids and a mechanical husband later, I do laundry all the time.  If I get two or three days between doing a load of laundry it's amazing!  I've always tried to keep with detergent that was dye free, but with as often as I do laundry, it was just getting expensive and I was always buying more.  Not to mention the dryer sheets.  With that being said, something had to give.  I thought why not try making some myself. 
I went in search of a "recipe" for laundry detergent and found a bunch.  Some for liquid and some for powder.  I took the easy way out and tried a powder version.  I love it!  It works great, uses little, lasts a long time, saves money, easy to mix and cleans our clothes! 
Here's what I do.  Let me know if you like it too!

Homemade Laundry Detergent
(from Serving Joyfully)

1 cup Borax
1 cup Washing Soda
1 bar Fels Naptha Soap, grated (I used Ivory soap instead and grated it in my food processor)
1/2 cup Oxi-Clean (optional)
1/2 cup Scent Booster (like Downy Unstoppables) (optional)

Mix everything together and store in an air-tight container (I used an Animal Cracker container).  I use  2 T per load.  If you have a large family or do lots of laundry like I do, I suggest triple or quadrupling this recipe to make it last a little longer.

Balsamic Honey Pulled Pork & Coleslaw

Who doesn't like a pulled pork sandwich? I typically make my pulled pork a BBQ, but the sound of Balsamic and Honey Pulled Pork I had to try this!  I love making pulled pork in the Crock-Pot.  It turns out great every time and is so easy.  This wasn't any different!  I loved the change in flavor too.  This is one of those meals that feeds a crowd, is great for picnics or parties and everybody loves.  What I really liked about this recipe is it had you cook your meat over cut up peppers and onions and they were great then later mixed into the shredded herbed meat with the delicious balsamic and honey sauce.  I made Coleslaw to go with them and that was a killer combo!  The leftovers were great and I even froze some of the leftover meat for later.  Give this a try at your next gathering of those you love.  :)

Balsamic and Honey Pulled Pork
(from Six Sister's Stuff)
Ingredients:
1 2 1/2 – to 3-pound boneless pork shoulder roast
1 cup chopped onion (1 large) (I used one with bone-in and it was great!)3/4 cup chopped green sweet pepper (1 medium)
1 teaspoon dried thyme, crushed
1/2 teaspoon dried rosemary, crushed
1/2 cup chicken broth
1 cup balsamic vinegar
3/4 cup ketchup
1/3 cup packed brown sugar
1/4 cup honey
1 tablespoon Worcestershire sauce
1 tablespoon Dijon-style mustard
1 clove garlic, minced
1/2 teaspoon ground black pepper
1/4 teaspoon salt


Directions:
1. Trim fat from meat. If necessary, cut meat to fit into a 3 1/2- or 4-quart slow cooker. In the cooker, combine onion and sweet pepper. Add meat; sprinkle with thyme and rosemary. Pour broth over meat.
2. Cover and cook on low-heat setting for 9 to 10 hours or on high-heat setting for 4 1/2 to 5 hours.
3. Meanwhile, for barbecue sauce, in a medium saucepan, combine vinegar, ketchup, brown sugar, honey, Worcestershire sauce, mustard, garlic, black pepper, and salt. Bring to boiling; reduce heat. Simmer, uncovered, for 20 to 25 minutes or until slightly thickened, stirring occasionally.
4. Transfer meat to a cutting board. Using two forks, pull meat apart into shreds, discarding fat. Strain vegetable mixture, discarding liquid. Return shredded meat and strained vegetables to cooker. Stir in barbecue sauce. If using high-heat setting, turn to low-heat setting Cover and cook for 1 hour.
5. To serve, spoon meat mixture onto bun bottoms. Top with coleslaw. Add bun tops.

Coleslaw
Ingredients:
1 head of cabbage (If you want more color use 1/2 purple and 1/2 regular)
1/2 cup milk
1/2 cup mayo
1 tsp vinegar
1T sugar
1/4 tsp cayenne pepper

Directions:
-Thinly slice cabbage and place in a large bowl. 
-In a separate bowl whisk together milk, mayo, vinegar, sugar and cayenne pepper.
-Pour milk mixture over cabbage and mix well.
-Cover and refrigerate for 1 hour before serving.
Keeps well for about 1 week.

XXL Cookie For One Please

Anyone that knows me knows that not only do I love to bake, but I love to eat anything baked too.  Cookies, well, cookies are my weakness.  I don't care what kind they are as long as they are baked right.  Now my hubby, give him Oreos and he's a happy guy.  Me, I need something a little better than that. 
We both got hooked on these Deep Dish Chocolate Chip Cookies that I blogged about here.  They are wonderful!  I usually make a batch and freeze and then we pull them out as we want them for a special treat on movie nights or just because we can. 
Then an amazing thing happened.  I found a recipe for XXL Cookies!  Not just in one flavor, but in five!  Sally's Baking Addiction has recipes for making Snickerdoodle, Monster M&M, Reese's Pieces Peanut Butter, Death by Chocolate and Buttery Soft Sugar Cookies.  I couldn't wait to try these!  Hubby wanted a Snickerdoodle and I wanted the Death by Chocolate.  For mine I substituted my favorite GF all-purpose flour and it turned out great!  So don't be afraid to try these GF.  They were amazing though.  They each filled an entire dinner plate and we each were not ashamed to say that we finished them off in one sitting.  (Although my belly was stuffed!)  These would be so fun to do at a birthday party or slumber party with kids too. 
If you love cookies like I do, you have to try these!  So fun. So good.  One bowl to mix.  Bake and eat.  Amazing!


Giant Snickerdoodle Cookie
(from Sally's Baking Addiction)
Ingredients:
  • 2 Tbsp butter, softened to room temperature
  • 4 Tbsp sugar + 1/4 tsp for sprinkling on top
  • 2 Tbsp beaten egg (crack the egg, beat it, and use 2 tbsp)
  • 1/2 tsp vanilla extract
  • 6 Tbsp all-purpose flour
  • 1/4 tsp baking soda
  • 1/4 tsp salt
  • 1/4 tsp cream of tartar (no substitutions)
  • 1/2 tsp cinnamon (divided)

  • Directions:
  • Preheat oven to 350 degrees. Spray cookie sheet with nonstick spray or use a silicone baking mat.
  • In a medium-sized mixing bowl, stir the butter and 4 Tbsp sugar together until creamed - mixture may be a bit crumbly. That's OK. Add the egg and vanilla until mixed. Stir in flour, baking soda, salt,cream of tartar, and 1/4 tsp cinnamon until just combined. Do NOT overmix.
  • Place the dough in the center of the prepared cookie sheet into a tall ball (see pictures above). Sprinkle with 1/4 tsp cinnamon and 1/4 tsp sugar. Bake for 14-16 minutes until the edges are browned. The center may appear undone but that's what you want. It will firm up. Allow to cool completely ON the baking sheet. Enjoy!
  •  
    Ingredients:
  • 2 Tablespoons unsalted butter, softened to room temperature
  • 2 Tablespoons granulated sugar
  • 2 Tablespoons light brown sugar (or dark brown)
  • 2 Tablespoons beaten egg (crack an egg, beat it, and use 2 Tablespoons)
  • 1/2 teaspoon vanilla extract
  • 1/4 cup all-purpose flour
  • 2 Tablespoons unsweetened cocoa powder
  • 1/2 teaspoon baking soda
  • 1/4 teaspoon salt
  • 1/4 cup dark chocolate chips + 1 Tablespoon, divided (or semi-sweet chocolate chips)
  • sprinkles, optional
  •  
    Directions:
  • Preheat oven to 350F degrees. Line a cookie sheet with parchment paper or silicone baking mat. Set aside.
  • In a medium size bowl, mix the softened butter and sugars together with a spoon or fork until creamed. Mix in the egg and vanilla.
  • In a separate small bowl, mix the flour, cocoa powder, baking soda, and salt. Pour the dry ingredients into the wet ingredients and mix to combine. Fold in 1/4 cup chocolate chips.
  • Place the dough in the center of the baking sheet and mold into a tall ball using a spoon (see picture above). Dot the top of the cookie with 1 Tablespoon of chocolate chips. Add sprinkles on top if desired. Bake for 14-15 minutes, or up to 16 minutes. The cookie will appear very soft, but will firm up as it cools. Allow to cool completely on baking sheet.
  •  

    Tuesday, June 18, 2013

    OMG Steaks

    I hope everyone had a fabulous weekend of celebrating their dads!  Ours, as usual, wasn't the norm.  Hubby had to work so our steak dinner was pushed off until Monday.  We did take him some In & Out for lunch at work along with a dessert surprise to share. 
    I made cupcake "burgers" and cookie "fries."  They turned out so cute!  I had some mini vanilla cupcakes in my freezer that I had made a while back with extra batter.  I knew I had to use them soon and this seemed like the perfect time!  I was going to use a brownie as the "burger" part, but since they were mini ones I thought it'd be too much.  Instead I tried making a Chocolate Ganache frosting for the "burger," used buttercream for the "ketchup" and "mustard,"  and colored some coconut green for the lettuce.  They turned out to cute!  I sprinkled the tops with sesame seeds and stuck them with a pick.  Perfect!  I found the original version HERE from Bakerella
    For the cookie "fries" I used my Grandma's Butter Cut-Out Cookie recipe and cut them into small strips, dusted them with sugar after they were out of the oven to look like salt and served them with sides of the extra "ketchup" buttercream and other frostings.  Take a look!  Cute, huh?


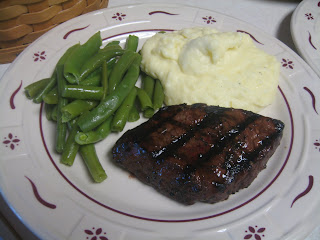
    Now, for our real dinner for Daddy on Monday I made regular good ole' mashed taters, steamed fresh green beans and we grilled the most amazing steaks.  My mouth is still watering thinking about those steaks!  I splurged and bought organic, grass fed good steaks.  I got sirloins though, so I wanted to make sure they would be tender and juicy and wanted to use a good marinade.  Well, every recipe I looked at on Pinterest for a good steak marinade all were the same.  This one.  And now I know why.  OMG!  This was hands down the best steak I've had in a long time!  I'd even venture to say to beat my steak at a 5 star restaurant here on the strip!  It was that good people!  Here's the recipe.


    OMG Steak Marinade

    1/3 cup soy sauce
    1/2 cup olive oil
    1/3 cup fresh lemon juice (I only had 1 lemon and it wasn't enough to equal 1/3 cup so I used juice from 1 lemon and 1 lime, worked great!)
    1/4 cup Worcestershire sauce
    1 1/2 T garlic powder
    3 T dried basil
    1 1/2 T dried parsley
    1 tsp pepper
    1 tsp minced garlic (about 2 cloves)
    Whisk together and pour over your steaks.  Cover and let marinade in the fridge for 4-6 hours.  Grill to your liking. 

    You gotta try this!!!

    Wednesday, June 12, 2013

    Sweet & Sour Chicken

    Who doesn't like Chinese take-out?  I do!  However, it's a luxury for us.  Actually, it's our tradition for Christmas Eve.  I love good Chinese food though.  I always feel intimidated to make it at home for fear that I'll be disappointed with it not turning out as good as how the professionals make it.  Besides my Fried Rice, I don't usually try to imitate it. 
    But.  I was running out of ideas for dinner and really wanting to try something new.  Something that would be easy, fast, GF and tasty.  I found this on my favorite place, Pinterest, and read the reviews and they all said great things about this recipe for Sweet and Sour Chicken by Made It. Ate It. Loved It.  I have to say, I was little skeptical of making a Chinese dish that called for ketchup, but I couldn't not try it after I read the comments everyone left.  This recipe called for all things that I usually have in my pantry and fridge, was put together in about half an hour and was delicious!  We ate it all up!  Even my kids!  You know what I say to that?  Winner winner chicken dinner! 

    Sweet and Sour Chicken
    From Made It. Ate It. Loved It.

    Chicken Breading:
      3-5 chicken breast
    salt and pepper
    1 cup cornstarch
    2 eggs, beaten
    1/3 cup canola oil


    Rinse chicken, trim off fat or extras and then cut into 1 inch cubes. season with salt and pepper. Dip chicken into cornstarch and coat all the way and then into eggs. Heat oil in large skillet. Cook chicken until browned. (Your chicken will look slightly like its coated in browned scrambled eggs.  Not really attractive.  But I promise it will crisp up when you put it in the oven!)  Place in baking dish. 3 chicken breasts can be in a 9x9 but 5 chicken breasts fits better in a 9x13.  (I just kept my chicken in the same skillet I browned it in and cooked it in that.  Worked great and I didn't have to dirty another dish!)


    Sauce:
     3/4 cups white sugar
    4 Tablespoons ketchup
    1/2 cup white distilled vinegar
    1 Tablespoon soy sauce
    1 teaspoon garlic salt
    Whisk until smooth. Then pour evenly over chicken. Turn chicken so the sauce gets on both sides and then put in the oven at 350 degrees for 15 minutes. Turn chicken and then cook for 15 more minutes.


    Thursday, June 6, 2013

    Getting My Cilantro On and Turning Chicken Green!

    Summer is here in Vegas!  It is definitely hot out there!  That means it's time to rev up the grill and pull out the Crock-Pot a little more.  I don't know why, by summer always makes me want to eat Mexican foods a little more too.  Maybe it's because now you can get all those peppers and citrus and herbs so much fresher.  I can almost smell them all right now!  Yum! 
    Cilantro is one of those herbs that I didn't really grow up eating or cooking with at all.  Unless it came in the salsa we bought, that was about it.  I love the smell of it, I'm figuring out how I like to cook with it now.  I've tried 2 different marinades and ways of cooking chicken using cilantro based marinades.  The first is a marinade for grilled chicken that I adapted from The Yummy Life and the second is a Crock-Pot recipe for a whole chicken from Paleo Pot.  For us I think the grilled chicken was the big winner.  Even after my hubby charred our chicken, the flavor was amazing and it was still juicy and tender.  The Crock-Pot chicken was good, but in my error, I didn't see that it needed to marinade overnight before going into the pot to cook.  The chicken was tender and moist and good, but the flavor wasn't as big as I was hoping for.  BUT!  I'm going to make Tacos today with the leftover chicken from it and I think it's going to be killer! 

    Cilantro Marinaded Grilled Chicken
    (Adapted from The Yummy Life's Thai Herb Chicken)
    The marinade was about the same color as my Tupperware
    marinade!  Freaked my hubby out!  LoL

    In the blender combine:
    a large handful of cilantro, stems removed
    3 garlic cloves
    2 slices fresh ginger, peeled and about 1/8" thick
    3/4 cup coconut milk
    juice from 1 lime
    2 T honey
    salt and pepper
    Once blended together pour over 3-5 chicken breasts.  Cover and marinade in refrigerator 2-24 hours.
    Grill over medium heat until cooked through and juices run clear.

    Chili Cilantro Lime Crock-Pot Whole Chicken
    (from Paleo Pot)

  • One 6 pounds whole chicken for a 6 quart slow cooker.
  • Dry rub (black pepper, sea salt, chili powder, cayenne powder, ground cumin). (I used about a teaspoon each of each)
  • 1/2 cup of lime juice (about 2 limes).
  • 1 extra whole lime for stuffing inside your chicken (yes that makes 3 limes total).
  • 2 generous handfuls of fresh cilantro.
  • 3 cloves of garlic.
  • 1 T olive oil.
    1. Wash your chicken off under cold tap water and then dry with paper towels.
    2. Dust your chicken with salt & pepper, and apply an even coating of chili powder, cayenne, and cumin to your taste. There is no magic amount or formula to use, yet do try to cover the whole bird with some spice. This also helps give the golden brown color you see in the picture.
    3. In a blender or food processor, combine your lime juice, cilantro, garlic, and olive oil. Pulse until an even consistency is reached.
    4. Take your extra lime and poke lots of holes into it with a fork. Now dust this lime with chili powder and stick it into the cavity of your chicken.
    5. Find a ziplock bag or crock pot liner large enough to hold your whole bird. Place your bird in the bag and pour your wet marinade over it. Use your hands to make sure the marinade is applied evenly around the chicken and under the skin, this is the important part. You can puncture the chicken breasts a few times with a knife for the marinade to seep into, yet this is not necessary. Making sure you get the marinade well applied and under the skin will do the trick.
    6. Seal your bag tight so that the marinade is making contact with the chicken all over. I used a crock pot liner bag which I pulled tight around the chicken and marinade, and then stuffed that into another large ziplock bag.
    7. Let your chicken marinade overnight. I know, you have to wait, but the morning will be true dump-and-go style cooking.
    8. Place your chicken in your Crock-Pot along with any marinade left over in your bag.
    9. Cook on low for 6 to 8 hours. I would recommend closer to 6.
    So, which one did you like more??
     

    Saturday, June 1, 2013

    Apple Fritters for National Donut Day!

    Last night as I was scrolling through my Facebook news feed I came across an ad for National Donut Day!  Did you know that we even have this?!  I didn't, but given any excuse to eat donuts I will do it with due diligence!  :)  So, I started looking at the few recipes I had pinned for GF donuts and couple of them didn't sound too hard or bad.  Then I remembered I had a recipe for my mom's apple fritters.  I got excited!  (Kinda like I am now!)  So I found it and decided that was what I was going to try, but make them GF so I could eat them too!  Hooray! 
    This morning I was excited to hit the kitchen, but needed some coffee motivation first.  I drank some of my beloved coffee and then set out to make my fritters before we had to get out the door for my son's last T-ball game.  (We wake up very much way too early around here.)  From start to finish it took about 15-20 minutes to make and fry my fritters and they were delicious.  I ate way too many, but it was so worth it!  Try these and, what they heck, make your own donut day!

    Mom's Apple Fritters

    Heat oil to 350
    Sift together:
    1 cup flour (regular or I used Jeanie's GF all-purpose flour)
    3-4 T sugar, depending how sweet you like them
    1 1/2 tsp baking powder
    1/2 tsp salt
    1/4 tsp cinnamon
    In a separate bowl lightly whisk together:
    2 eggs
    1/3 cup milk
    1 T melted butter
    1/2 tsp vanilla
    Pour liquid ingredients into dry and mix until incorporated.
    Stir in 1 apple cut into small cubes.
    I used a large cookie scoop (or ice cream scoop) and dropped into hot oil.  Fry for about 2-3 minutes a side or until golden brown and cooked all the way through.  You can make them smaller too if you wish.  Drain on paper towel and sprinkle with powdered sugar.  Devour!