Hello! Summer is officially over. Today marks the first day of school for my 2nd grader and kindergartner. (Although he hasn't left yet, he goes in the afternoon) After being "home" in Ohio for 8 weeks it feels good to be home and getting back in the swing of things.
We were so blessed to be able to be with family and friends and completely drenched in love by those we love. We got to stay with Grandma and Poppy all summer and enjoy lots of swimming. My kids got spoiled with lots of attention, junk food, presents and mostly hugs and kisses. We could not have asked for things go to better. No one got sick or hurt (other then skinned knees and small bruises). We had 3 bedrooms and a bathroom to ourselves, so our set up was more then wonderful. Eric even got to surprise the kids and come for 2 weeks too. It was amazing!
We also all got to the point of being a little homesick too. Especially my 2 year old. No one saw that coming! She cried for Daddy, her Minnie Mouse bed and her princess castle. We made it back about a week ago and it's felt so good. Poppy even got to fly home with us to give me extra hands with the kids during the flight and left on Saturday. Then I kicked into high gear and cleaned and laundered the house over the weekend. I had to get that stale man smell out! Last night backpacks were labeled and stuffed and lunch packed. Kids were washed and in bed by a decent hour. Yes, let the new school year begin!
Eric and I decided to treat ourselves one more time with XXL Cookies before we got kick in gear this week too. Today it's back to trying to run for me. Haha! Hubby is beginning to work out more to get ready for his next PT test too. Let's not forget our diet. Everyone has fully enjoyed summer, maybe a little too much. So today I'm doing a liquid diet during the day and a good, healthy dinner at night this week to try and get my body back to liking me again. Lots of water, juice, green and fruit smoothies and of course a little coffee too. :)
Hubby and I have talked about trying to eat clean and do our best to be healthy together. I'm still working on gluten free and going to try to cut out some dairy for myself as well. We'll smash together Clean Eating and Paleo and make it work for each of us and our family. I'll be back in the kitchen and trying to keep it healthy and simple. Here's to a fresh start again to a new school year! I'm really excited to try more new things and let you know how they turn out. Got any new things you've tried? I'm always up for a new challenge.
**Sorry for all the random blog posts. I wrote them all as drafts before we left and tried posting every week, but I think they posted differently then I thought. They had a mind of their own! I'll be fresh and new again, promise.
Monday, August 26, 2013

Tuesday, July 9, 2013
Paleo Shamaleo
This thing called Paleo intrigues me. I'm subscribed to a few paleo blogs that I really enjoy. They each offer a little something different and recipes that I feel like I could take on and do. Some I do already! A few of my favorite blogs are Change of Pace, Paleo OMG and The Paleo Mama. I never, ever dreamed that I would ever ever want to change my diet, way of eating and cooking to be so restrictive. I'm still not totally there yet; but the more I read and the more I'm trying to figure out why I feel the way I do, the more I'm thinking about it. I'm not ready to take that plunge this summer, especially being home with family and friends and picnics. Soon, very soon, I just might though.
As I'm trying out some of these ways and dabbling in some of these recipes, it's fun trying new things. Baking this way is especially tricky. So many things call for banana and I like bananas, but a girl can only mash up so many in a week. But, it is a great binder, sweetener and flavor for some great recipes.
 I tried a little spin on one of my recent favorite recipes by adding blueberries to my Banana Bread Paleo Pancakes. I love smearing them with butter, dousing them with maple syrup, cutting up some banana on top and this time I added some coconut chips too. YUM!! They were so good! It was great to be able to put a spin on an already great recipe that I make a lot. I probably make these once a week for myself, so now trying different flavors is great!
Paleo and baking don't exactly go well together considering you can't have sugar, butter or flour; so it gets a little tricky. I tried making sweet potato brownies during my GF brownie trial and they definitely needed some work. Maybe it was a baker error, but they weren't that great. I don't want to give up on paleo desserts though! I'm determined to keep trying. I found a recipe for Flourless Peanut Butter and Banana Chocolate Chip Cookies on Pinterest and decided to give it a try. They actually weren't bad at all! My kids kinda liked them too. If you try these, don't be surprised with oil on the cookie sheet after they bake. Let them sit for a few minutes and it's all good. These little cookies, puff up like regular ones and tasted not bad at all. Only thing is, eat them within a day or 2. The banana does make them get a little yucky quickly. Refrigerate any that don't get eaten that first day and all is good.

Flourless Peanut Butter and Banana Chocolate Chip Cookies
(From Inspired Edibles)
1 cup all natural smooth peanut butter (just nuts, sugar free, sodium free),
substitute almond butter for paleo version (I used Jiff, probably why I had the oil after baking)
1 ripe banana
2 tsp natural vanilla essence (I used regular vanilla extract)
1 egg
3 Tbsp pure maple syrup or honey
1/2 cup quality dark chocolate chips* + a few more for topping (I used semi-sweet)
Directions:Heat oven to 325 F
As I'm trying out some of these ways and dabbling in some of these recipes, it's fun trying new things. Baking this way is especially tricky. So many things call for banana and I like bananas, but a girl can only mash up so many in a week. But, it is a great binder, sweetener and flavor for some great recipes.

 |
| The Perfect Bite |

Flourless Peanut Butter and Banana Chocolate Chip Cookies
(From Inspired Edibles)
Directions:Heat oven to 325 F
- Using a simple hand mixer, food processor or blender, mix together peanut butter, banana and vanilla until well combined and smooth.
- Add egg and maple syrup or honey and mix to combine.
- Mix in dark chocolate chips by hand with the help of a spatula or wooden spoon.
- Place mixture in fridge for about 20 minutes to allow it to firm slightly.
- Place parchment paper over a baking sheet and gently brush or spray the paper with olive oil.
- Drop peanut butter cookies onto sheet by rounded tablespoons allowing room between the cookies (they will expand and puff up somewhat). Add another chip or two to the top of each cookie.
- Place cookies in oven and bake for 20 minutes.
- Remove from oven and allow cookies to cool on a rack for a few minutes before enjoying!
Wednesday, June 26, 2013
Summer Fun Popsicles
Summer lovin' had me a blast. Summer lovin' happened so fast. Oh well, oh well, oh well, oh well, huh! That Grease song gets in my head sometimes when I think about the fun of summer. Summer can be tricky with having school age kids home for summer, they seem to throw everything off. Plus it's more mouths to feed during the day. My oldest is going to be in second grade. Although she is a petite little thing, she can out eat anyone, anytime. She is constantly hungry and for the most part always finishes everything she's given. She has even gotten trouble for sneaking extra snacks and candy in her school backpack and for spending all her saved money on buying food at school too. She is ridiculous! I promise you, she is fed enough, she just has her daddy's metabolism that is super fast. They both are hungry every 5 minutes. The funny part is that daddy has little patience with her with this. Ironic isn't it? The things that our kids get the most from us, are the things that drive us the most crazy. Funny, funny life.
That being said, I've told you all how I've been trying so hard to cut out the processed junk from my kids snacks. One thing they always love, like most kids, is Popsicles. I wanted to make some of our own. I got a little creative myself with it and made 3 different kids. My kids all seem to like them all.
Strawberry Cream Pops
1 cup (or more) Greek yogurt
8 oz frozen strawberries in syrup, slightly thawed
Blend together adding more or less of each until you reach a good consistency. Pour into 5oz paper cups and freeze on cookie sheet for 15-20 minutes, pull out and insert Popsicle stick in the center of pop and put back into the freezer for at least 2 hours or until frozen through. Peel off paper cup when ready to eat and enjoy. Makes about 6 pops.
Blueberry Cream Pops
1 cup (or more) Greek yogurt
1 cup frozen blueberries
1-2 T honey
Blend together adding more or less of each until you reach a good consistency and sweetness you like. Pour into 5oz paper cups and freeze on cookie sheet for 15-20 minutes, pull out and insert Popsicle stick in the center of pop and put back into the freezer for at least 2 hours or until frozen through. Peel off paper cup when ready to eat and enjoy. Makes about 6 pops.
Strawberry Ice Pops
8 oz frozen strawberries in syrup, slightly thawed
about 1 cup 100% apple juice
Blend together adding more or less of each until you reach a good consistency. Pour into 5oz paper cups and freeze on cookie sheet for 20-25 minutes, pull out and insert Popsicle stick in the center of pop and put back into the freezer for at least 2 hours or until frozen through. Peel off paper cup when ready to eat and enjoy. Makes about 6 pops.

That being said, I've told you all how I've been trying so hard to cut out the processed junk from my kids snacks. One thing they always love, like most kids, is Popsicles. I wanted to make some of our own. I got a little creative myself with it and made 3 different kids. My kids all seem to like them all.
 |
| Enjoying a nice cold treat after a hot day of swimming :) |
Strawberry Cream Pops
1 cup (or more) Greek yogurt
8 oz frozen strawberries in syrup, slightly thawed
Blend together adding more or less of each until you reach a good consistency. Pour into 5oz paper cups and freeze on cookie sheet for 15-20 minutes, pull out and insert Popsicle stick in the center of pop and put back into the freezer for at least 2 hours or until frozen through. Peel off paper cup when ready to eat and enjoy. Makes about 6 pops.
Blueberry Cream Pops
1 cup (or more) Greek yogurt
1 cup frozen blueberries
1-2 T honey
Blend together adding more or less of each until you reach a good consistency and sweetness you like. Pour into 5oz paper cups and freeze on cookie sheet for 15-20 minutes, pull out and insert Popsicle stick in the center of pop and put back into the freezer for at least 2 hours or until frozen through. Peel off paper cup when ready to eat and enjoy. Makes about 6 pops.
Strawberry Ice Pops
8 oz frozen strawberries in syrup, slightly thawed
about 1 cup 100% apple juice
Blend together adding more or less of each until you reach a good consistency. Pour into 5oz paper cups and freeze on cookie sheet for 20-25 minutes, pull out and insert Popsicle stick in the center of pop and put back into the freezer for at least 2 hours or until frozen through. Peel off paper cup when ready to eat and enjoy. Makes about 6 pops.

Thursday, June 20, 2013
Vanilla Rice Pudding Deliciousness
Ever since I was a little girl I have loved rice pudding. Although, I think it was the one thing that my mom never made. I always had it at restaurants if they had it in a salad bar or dessert or something. I had pinned this recipe for Vanilla Coconut Rice Pudding a while back and kinda forgot about it. Then I was at my friend's house and she had made some. It was so good! I hadn't had rice pudding in a long time and almost forgot how much I like it. Then I remembered I had a recipe pinned for some. I found it. To my happiness I had everything I needed at home. Even the coconut milk and vanilla bean! I was so excited to try this and so hoping it was going to turn out good. Oh. My. Goodness. Did it turn out? It was deliciousness in my mouth! It was creamy, had amazing vanilla flavor, a hint of cinnamon and was just plain to die for! This has become a treat for me. No one else in my family likes it, which I'm ok with. More for me then! I usually double or make 1 1/2 recipes of it and snack and dessert and salivate over it for a few days. It is just so yummy! I like it warm. So even though I keep it refrigerated I always heat it up in the microwave to make it good and steamy. Is it just me, or is starting to sound a little time like a bad romance novel? Ha ha! Ok, I think you get the idea now that this is deliciousness and that you have to try it!!! Let me know if you love it as much as I do!

Vanilla Coconut Rice Pudding
(adapted from Ffffood)
1 1/2 cups of cold cooked rice (I either use left over rice, make sure to make extra so I have left over rice or cook it an hour or 2 before I'm going to make it so it can cool before I make it.)
1 1/2 cups of coconut milk
2 cups of whole or 2% milk
1/3 cup of sugar
pinch of salt
1 vanilla bean, insides scraped out (The first time I made this I scraped the seeds out and put them along with the bean pod in the pot. The second time I used only the seeds. The last time I made this I didn't have any beans and added 2 tsp of vanilla extract and it was still great. I don't think you can go wrong here any way you make this.)
1 cinnamon stick (this is my addition and it give this a great cinnamon undertone)
Combine all the ingredients together in a saucepan and simmer over medium-low heat for 40 minutes (or until most of the liquid has absorbed and is good and creamy looking). Stir occasionally to make sure it isn't sticking. Allow to cool and serve.

Vanilla Coconut Rice Pudding
(adapted from Ffffood)
1 1/2 cups of cold cooked rice (I either use left over rice, make sure to make extra so I have left over rice or cook it an hour or 2 before I'm going to make it so it can cool before I make it.)
1 1/2 cups of coconut milk
2 cups of whole or 2% milk
1/3 cup of sugar
pinch of salt
1 vanilla bean, insides scraped out (The first time I made this I scraped the seeds out and put them along with the bean pod in the pot. The second time I used only the seeds. The last time I made this I didn't have any beans and added 2 tsp of vanilla extract and it was still great. I don't think you can go wrong here any way you make this.)
1 cinnamon stick (this is my addition and it give this a great cinnamon undertone)
Combine all the ingredients together in a saucepan and simmer over medium-low heat for 40 minutes (or until most of the liquid has absorbed and is good and creamy looking). Stir occasionally to make sure it isn't sticking. Allow to cool and serve.
Cha-Cha-Cha-Chia!
Alright, am I the only one that sings that commercial jingle every time you see a recipe for Chia Pudding? I mean, come on, it was one of those huge novelties things from childhood. Who here had Chia Pet? I didn't, but I always wanted one to try. I guess now is my chance! Cha-cha-cha-chia! Oh that makes me smile from the inside out. :) Guess what? They're even still around! Everything from a hippo to Sponge Bob. Did you know they even make those things in the form of our president? And not just in one style either. No, they have him "happy" and "determined." Now that's funny!! Just me? Oh well, at least I amuse myself. Ha ha!
Ok, anyways, back to where I was going with this. So chia seeds are the new big health thing it seems anymore. Add them to your smoothie, oatmeal, yogurt or anything else for that matter. Similar to flax seeds in nutritional value. Loaded with Fiber, Omega 3's and Protein, can't go wrong I guess.
I kept seeing recipes for Chia Pudding and pictures of this odd looking stuff. I was intrigued and wanted to try it. On a recent trip in Trader Joe's I saw a bag of them and there, right on the back of the bag, was a recipe for Chia Pudding. I thought I'd give it whirl and still looked up few variations of Chia Pudding on Pinterest. One that caught my eye was for Chocolate Coconut Chia Pudding.
So here is my take on the stuff... It is easy enough to mix up to have a snack or treat. The look of it is so weird. It looks like caviar in cream almost. Gross. The taste isn't bad, but the texture for me was off putting. I didn't really care for it much. Be your own judge. Try for yourself. Maybe you'll love this healthy treat. Me, not so much.
Chia Pudding
In a jar combine:
1/4 cup Chia Seeds
1 cup coconut or almond milk
1/4 cup or less of honey or sweetener of you liking.
Add in flavoring, fruit or cocoa.
Cover, shake to combine and refrigerate for at least 2-3 hours or overnight.
Ok, anyways, back to where I was going with this. So chia seeds are the new big health thing it seems anymore. Add them to your smoothie, oatmeal, yogurt or anything else for that matter. Similar to flax seeds in nutritional value. Loaded with Fiber, Omega 3's and Protein, can't go wrong I guess.
I kept seeing recipes for Chia Pudding and pictures of this odd looking stuff. I was intrigued and wanted to try it. On a recent trip in Trader Joe's I saw a bag of them and there, right on the back of the bag, was a recipe for Chia Pudding. I thought I'd give it whirl and still looked up few variations of Chia Pudding on Pinterest. One that caught my eye was for Chocolate Coconut Chia Pudding.
So here is my take on the stuff... It is easy enough to mix up to have a snack or treat. The look of it is so weird. It looks like caviar in cream almost. Gross. The taste isn't bad, but the texture for me was off putting. I didn't really care for it much. Be your own judge. Try for yourself. Maybe you'll love this healthy treat. Me, not so much.
 |
| Yes, I used a recycled pickle jar, but it worked great! Look at that funky stuff! |
In a jar combine:
1/4 cup Chia Seeds
1 cup coconut or almond milk
1/4 cup or less of honey or sweetener of you liking.
Add in flavoring, fruit or cocoa.
Cover, shake to combine and refrigerate for at least 2-3 hours or overnight.
 |
| Chocolate Coconut Chia Pudding |
Mama's Apple Dumplings
I think that most people have those certain foods that their mom made growing up, no matter how fancy or not, that just make you feel so comforted. Since my brothers and I were completely spoiled with the best mom who has always been the best cook, there are so many favorites! One favorite that has even spread onto each of our spouses as well is my Mama's Apple Dumplings. I know I'm a mid-west girl from Ohio and not a southern one with an accent, but when talking about dumplings it only feels right to say "mama's" instead of "mom's." Don't you think? Her apple dumplings are so good. I don't even think their is a season for them, I make them year round. In fact, they are what my hubby wanted me to make for his father's day dessert this year. Comfort food at its best, right here!
They are best hot out of the oven, but if you happen to have any left over they are great reheated in the microwave too. Most members of our family pour in a slash or two of milk when we eat ours, but feel free to top them with ice cream or whipped cream or anything else your heart desires. These are also easy to adapt to make them GF by substituting your favorite GF double pie crust recipe or using GF all-purpose flour in the following recipe. Or if you feel way too intimidated to making your own pie crust, go buy some ready to use crust from the grocery store and tell everyone you made it. :) Sometimes when it's colder out we'll have double dumpling night and I'll make Apple Dumplings and Dumpling Soup for dinner. Yum!
 Double Pie Crust
Ingredients:
2 cups flour
1 tsp salt
1/4 cup chilled shortening, cut into small cubes
1/2 cup (or 1 stick) butter, cut into small cubes
4-8 T ice cold water
Directions:
-Combine flour and salt.
 -Cut shortening and butter into flour using a pastry blender or by pulsing in a food processor until it looks like coarse crumbs with pea size pieces.
-Add in water a couple tablespoons at a time, mixing until the dough holds together.
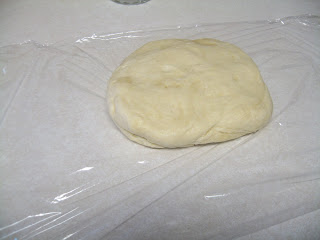
-Form dough into 2 balls and flatten on 2 pieces of plastic wrap
-Refrigerate for 30-60 minutes before rolling out.
-Roll dough out on a lightly floured surface to desired size and place in pie plate
Mama's Apple Dumplings
makes 6-8 dumplings
Ingredients:
Double Pie Crust, prepared
2 large Granny Smith apples, peeled, cored and cut into small cubes
1/2 tsp vanilla
1T cinnamon or cinnamon spice mixture
about 1 stick of butter
about 1/2 cup brown sugar
2 cups dark Karo syrup
2-3 cups of water
Directions:
-Preheat oven to 400
-In a bowl combine apples, vanilla and cinnamon, mix until apples are evenly coated with cinnamon.
 -In a 9x13 baking dish, whisk together Karo syrup and water. (For a thicker sauce less water for a thinner sauces more water. Either way it will be watery at this point.) Whisk it until it is fully combined.
 -Roll out your prepared pie crust in one large rectangular shape.
-Use a knife to cut into fairly equal size "squares." They do not have to be perfect.
-In the middle of each "square" put a large spoonful of apples. Top apples with about 1 T butter and 1 T brown sugar. More or less of each to your liking.
 -Fold corners of each "square up and form into a ball, pinching all sides to conceal the apples with no openings.
 -Place sealed up dumpling in syrup in baking dish
 -Repeat with remaining dumplings
-Sprinkle tops of dumpling with extra cinnamon if you desired
-Bake at 400 for 45-60 minutes or until bubbly and golden brown.

They are best hot out of the oven, but if you happen to have any left over they are great reheated in the microwave too. Most members of our family pour in a slash or two of milk when we eat ours, but feel free to top them with ice cream or whipped cream or anything else your heart desires. These are also easy to adapt to make them GF by substituting your favorite GF double pie crust recipe or using GF all-purpose flour in the following recipe. Or if you feel way too intimidated to making your own pie crust, go buy some ready to use crust from the grocery store and tell everyone you made it. :) Sometimes when it's colder out we'll have double dumpling night and I'll make Apple Dumplings and Dumpling Soup for dinner. Yum!
 Double Pie Crust
Ingredients:
2 cups flour
1 tsp salt
1/4 cup chilled shortening, cut into small cubes
1/2 cup (or 1 stick) butter, cut into small cubes
4-8 T ice cold water
Directions:
-Combine flour and salt.
 -Cut shortening and butter into flour using a pastry blender or by pulsing in a food processor until it looks like coarse crumbs with pea size pieces.
 -Add in water a couple tablespoons at a time, mixing until the dough holds together.
-Form dough into 2 balls and flatten on 2 pieces of plastic wrap
-Refrigerate for 30-60 minutes before rolling out.
-Roll dough out on a lightly floured surface to desired size and place in pie plate

Mama's Apple Dumplings
makes 6-8 dumplings
Ingredients:
Double Pie Crust, prepared
2 large Granny Smith apples, peeled, cored and cut into small cubes
1/2 tsp vanilla
1T cinnamon or cinnamon spice mixture
about 1 stick of butter
about 1/2 cup brown sugar
2 cups dark Karo syrup
2-3 cups of water
Directions:
-Preheat oven to 400
-In a bowl combine apples, vanilla and cinnamon, mix until apples are evenly coated with cinnamon.


-Use a knife to cut into fairly equal size "squares." They do not have to be perfect.
-In the middle of each "square" put a large spoonful of apples. Top apples with about 1 T butter and 1 T brown sugar. More or less of each to your liking.


-Sprinkle tops of dumpling with extra cinnamon if you desired
-Bake at 400 for 45-60 minutes or until bubbly and golden brown.

Wednesday, June 19, 2013
Laundry Time!
I used to have one day a week that was laundry day. Now, three kids and a mechanical husband later, I do laundry all the time. If I get two or three days between doing a load of laundry it's amazing! I've always tried to keep with detergent that was dye free, but with as often as I do laundry, it was just getting expensive and I was always buying more. Not to mention the dryer sheets. With that being said, something had to give. I thought why not try making some myself.
I went in search of a "recipe" for laundry detergent and found a bunch. Some for liquid and some for powder. I took the easy way out and tried a powder version. I love it! It works great, uses little, lasts a long time, saves money, easy to mix and cleans our clothes!
Here's what I do. Let me know if you like it too!
Homemade Laundry Detergent
(from Serving Joyfully)
1 cup Borax
1 cup Washing Soda
1 bar Fels Naptha Soap, grated (I used Ivory soap instead and grated it in my food processor)
1/2 cup Oxi-Clean (optional)
1/2 cup Scent Booster (like Downy Unstoppables) (optional)
Mix everything together and store in an air-tight container (I used an Animal Cracker container). I use 2 T per load. If you have a large family or do lots of laundry like I do, I suggest triple or quadrupling this recipe to make it last a little longer.

I went in search of a "recipe" for laundry detergent and found a bunch. Some for liquid and some for powder. I took the easy way out and tried a powder version. I love it! It works great, uses little, lasts a long time, saves money, easy to mix and cleans our clothes!
Here's what I do. Let me know if you like it too!
Homemade Laundry Detergent
(from Serving Joyfully)
1 cup Borax
1 cup Washing Soda
1 bar Fels Naptha Soap, grated (I used Ivory soap instead and grated it in my food processor)
1/2 cup Oxi-Clean (optional)
1/2 cup Scent Booster (like Downy Unstoppables) (optional)
Mix everything together and store in an air-tight container (I used an Animal Cracker container). I use 2 T per load. If you have a large family or do lots of laundry like I do, I suggest triple or quadrupling this recipe to make it last a little longer.

Subscribe to:
Posts (Atom)